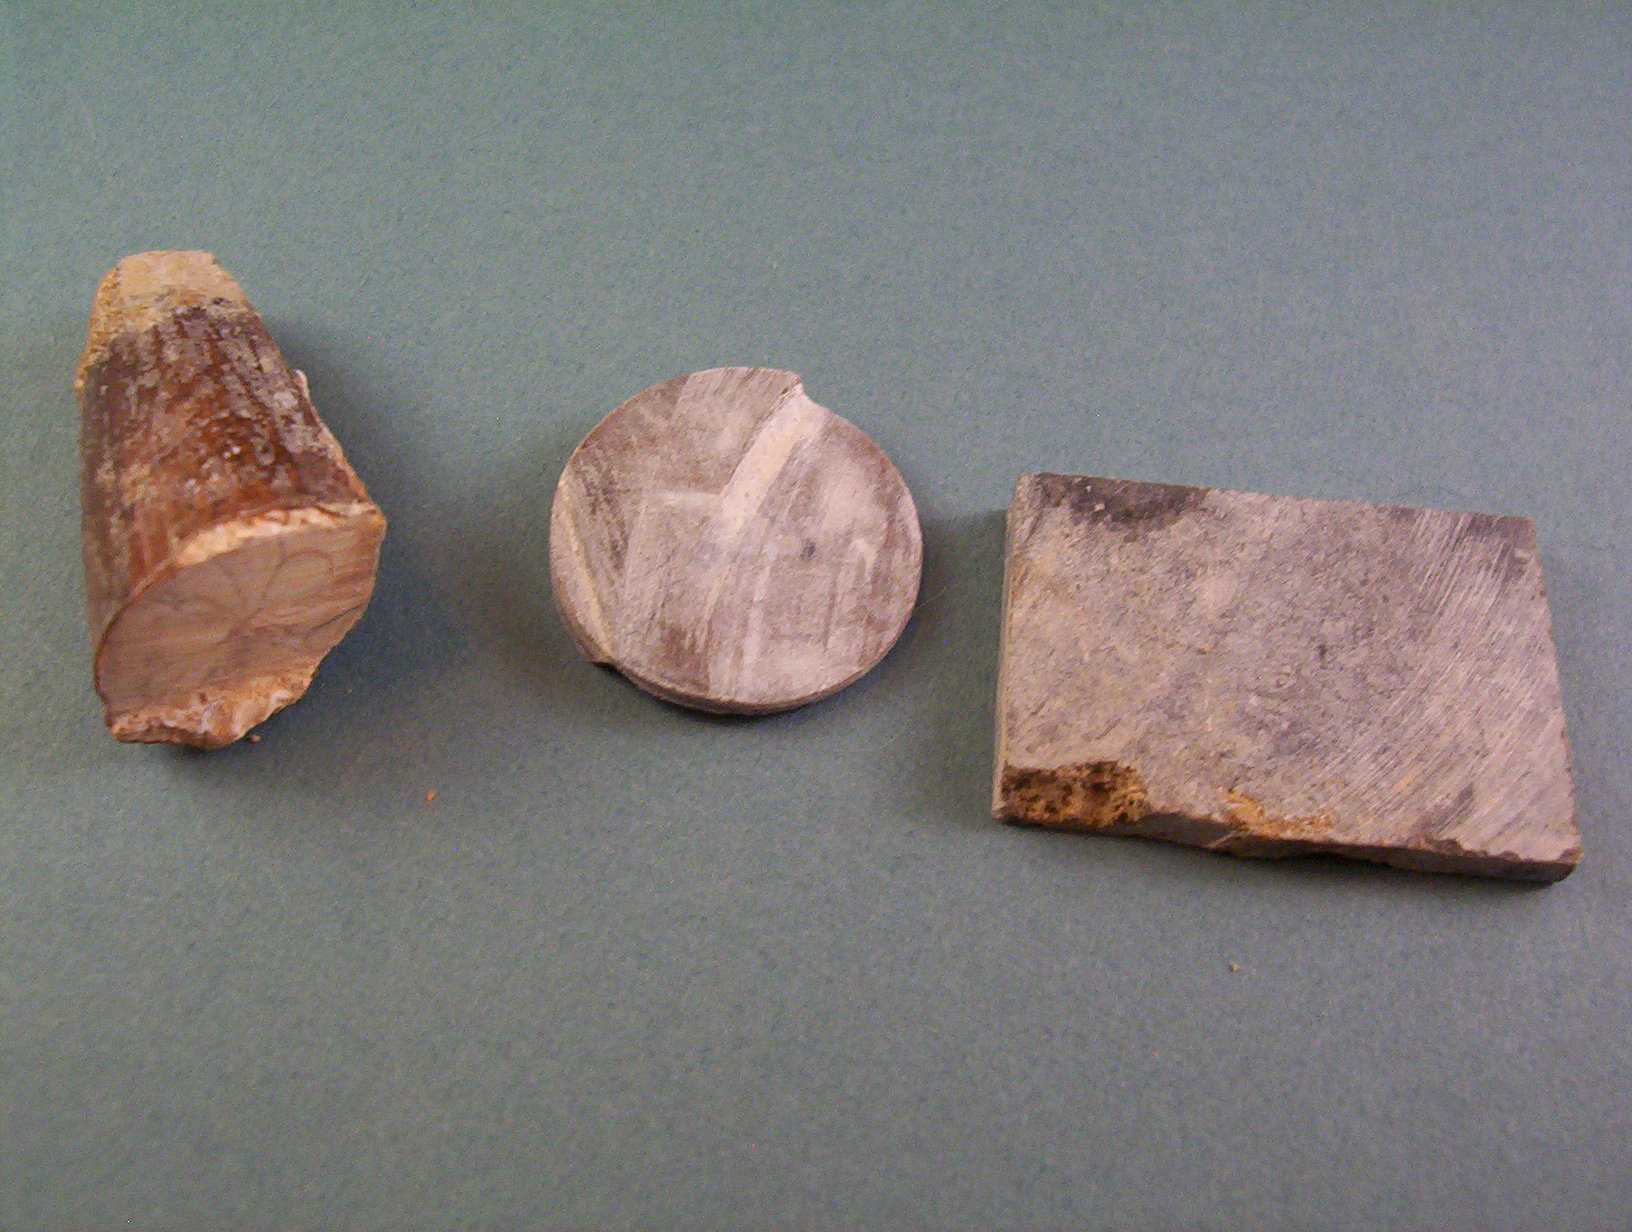
Figure 1 - Samples ready for grinding on the first surface.
A Spinosaur tooth and several
Paleozoic pieces.
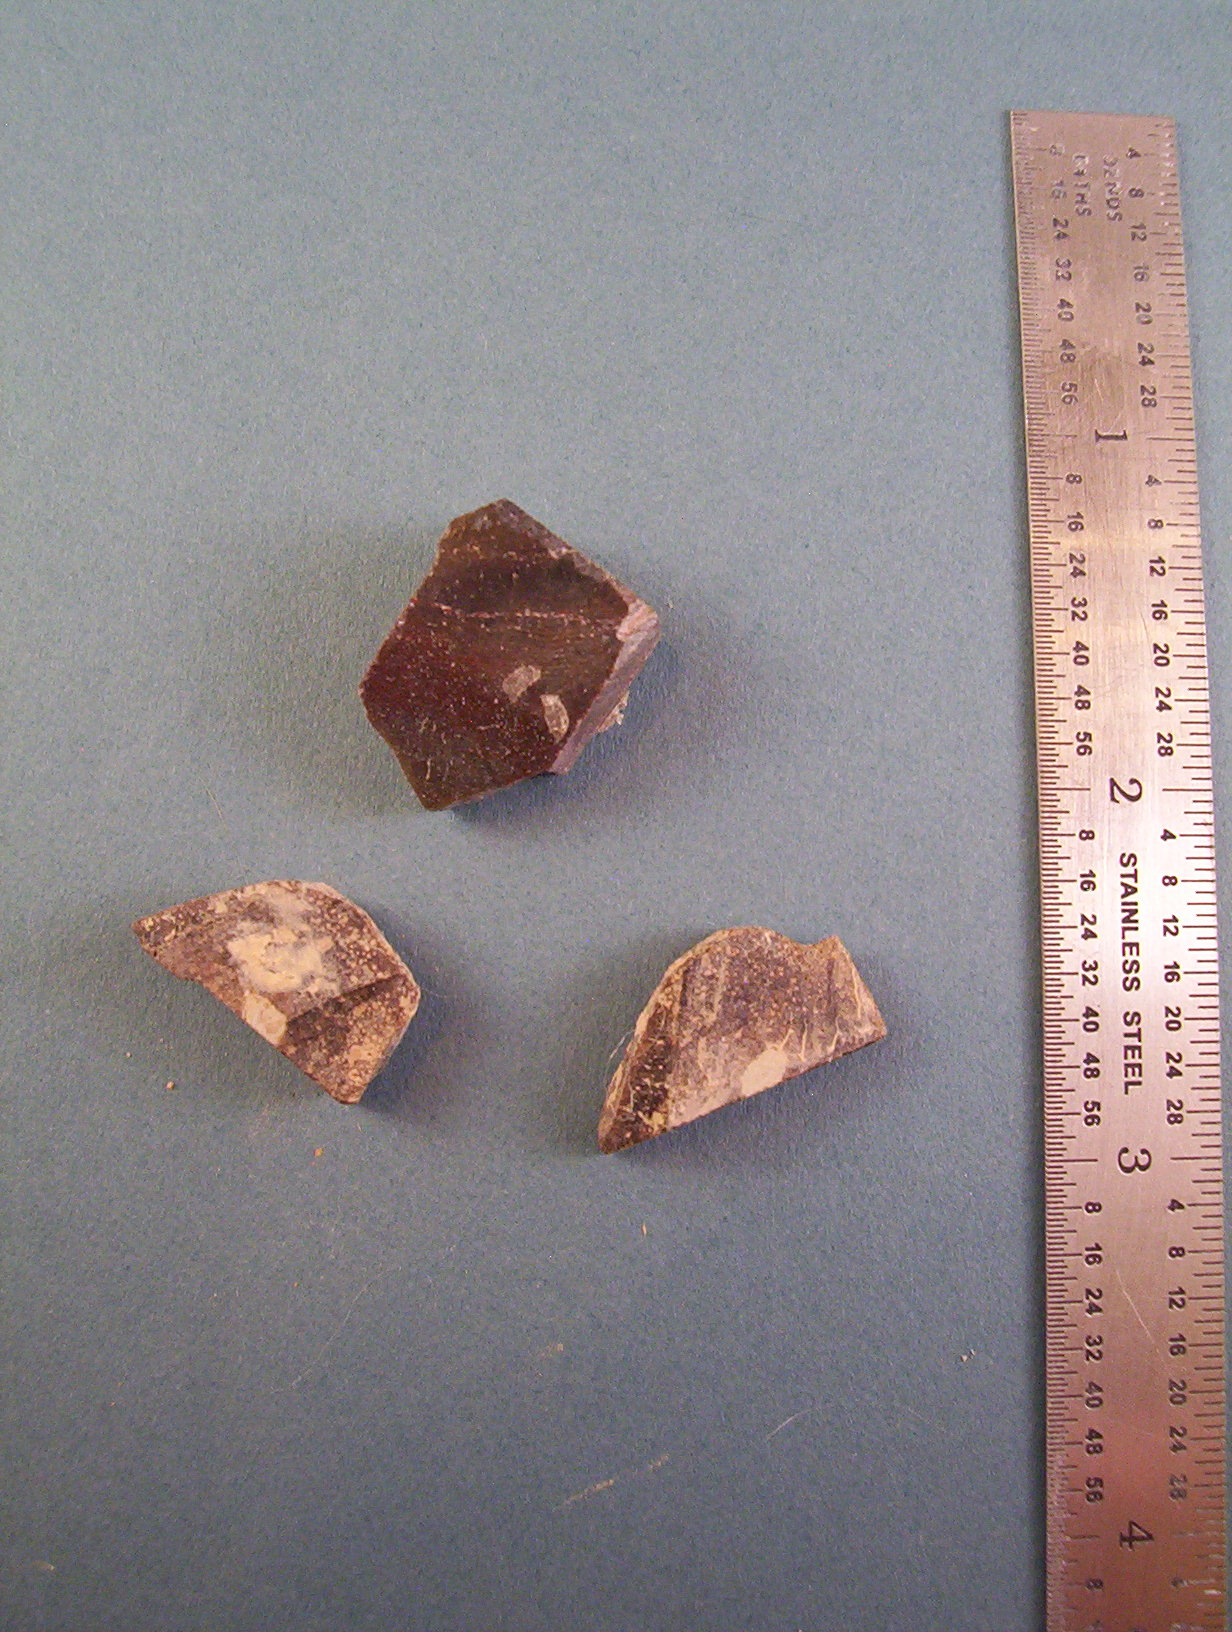
Figure 1b - Pieces of ceratapsian bone.
Abstract
A method of manually making thin sections is presented. Simple techniques for maintaining parallelism that avoids direct measurement is described in detail and a number of examples are shown.
Introduction
Most amateur paleontologists never bother to look at their specimens with a magnifying glass let alone a microscope and thus do not notice the detail available in most fossils and the abundance of microscopic flora and fauna that exist. These microfossils can be individual tiny fauna, juvenile stages of larger fauna, or parts of larger fauna. Soft shales and friable limestones offer opportunities to free microfossils from matrix without resorting to drastic chemical methods, but too often the microfossil hunter comes across exquisite fossils in glass hard matrix. In such cases the difference in hardness between fossil and matrix is usually so close that there seems no way to free and exhibit the fossils for examination. Thin sectioning these hard rocks is a means to not only enjoy these fossils, but in many of cases may be the only means of accurately classifying the fossils. This can also lead the amateur paleontologist on an exploration in the microstructure of some of the largest megafossils.(Jones 1956)
This paper is a revision of an earlier work by the author (Hill, 1999) with newer, easier, faster and cleaner techniques added or replacing older techniques for just about every step.
The techniques described here are simple but can lead to remarkable results. This was gleaned from several sources and tried over the last few years. (Allman & Lawrence 1982, Kummel & Raup 1965) Patience is required for rushing the job will inevitably lead to ruin of the specimen and a waste of the time put in to the work. Materials, for the most resourceful amateur, can literally cost nothing and at most will cost little.
The task is to find a good specimen, grind and polish one face of a small cut out slab, glue that to a glass slide. Next, grind down and polish the other face of the specimen so that it is parallel to the first side and only about 0.03-0.05mm thick.
Finding a specimen.
Check the matrix around some of your fossils and you will likely find pill-shaped, torpedo-shaped and round inclusions. If you are lucky and the formation is rich, you may find identifiable fossils that are smaller (juvenile) versions of the megafossils. In the field you might find a rock that looks for all the world like a collection of spherical or cigar shaped grains. If you know the matrix to contain abundant megafossils then it is likely full of microfossils and you would do well to bring back a rock of the material. Many is the time I found a rock that only looked mildly promising and upon making the thin section found it to be abundantly rich in fauna. I have yet to find a promising rock that proved to be uninteresting.
Cutting the specimen out.
Back in the lab (read garage or basement!) cut off a piece of one end of the rock. The harder the rock is the better. You don't want it crumbling. (We will deal with the crumbly ones later.) You do not need to cut off more than a one inch square piece and would be better off if it were less for a first effort. A round specimen is even easier to work and can be quickly obtained with a 10-20mm tubular diamond grinding tool in a drill press.
If you do not have a motorized saw, a simple hack saw should do well. Cut another piece off the main rock as thin as you can, 2-4mm will do but 1-2mm is better. If it breaks then save the pieces. The important part is that you have a little slab with roughly flat, parallel sides under 1 square inch area.
Should you have a nice sized sample with rough sides that are anything but parallel, you can make it a little more regular by rubbing it against a circular sanding pad of about 40-60 grit. At this point it only has to be approximately parallel.
Figure 1 - Samples ready for grinding on the first surface.
A Spinosaur tooth and several
Paleozoic pieces.
Figure 1b - Pieces of ceratapsian bone.
Materials for grinding.
When I started out with this work in the late 1990s I used grinding powders, available from any well supplied rock shop, with techniques learned in telescope mirror making over three decades. Since then numerous grinding materials have been discovered that make the job so much easier and cleaner. For example, above the circular sanding pad was mentioned, a real time saver for roughing in the sample.
For the next steps a selection of the thin 6-8” circular lapping disks are handy. I use 100, 500 and 1200 almost exclusively. I have used the thick lapping wheels but find the thin ones are much cheaper and if set on a good flat surface (like a piece of glass or a sink cut-out from an installed kitchen or bathroom countertop) will work excellently well.
If you decide to work with powders I refer you to the earlier article on line at:
Other items needed will be:
Diamond polishing paste while not only expensive is too hard for this work. Titanium oxide is too slow and soft. Cerium offers a good compromise and is a very fast polisher especially if attention is paid to the last grinding step to make sure it is "fined" thoroughly.
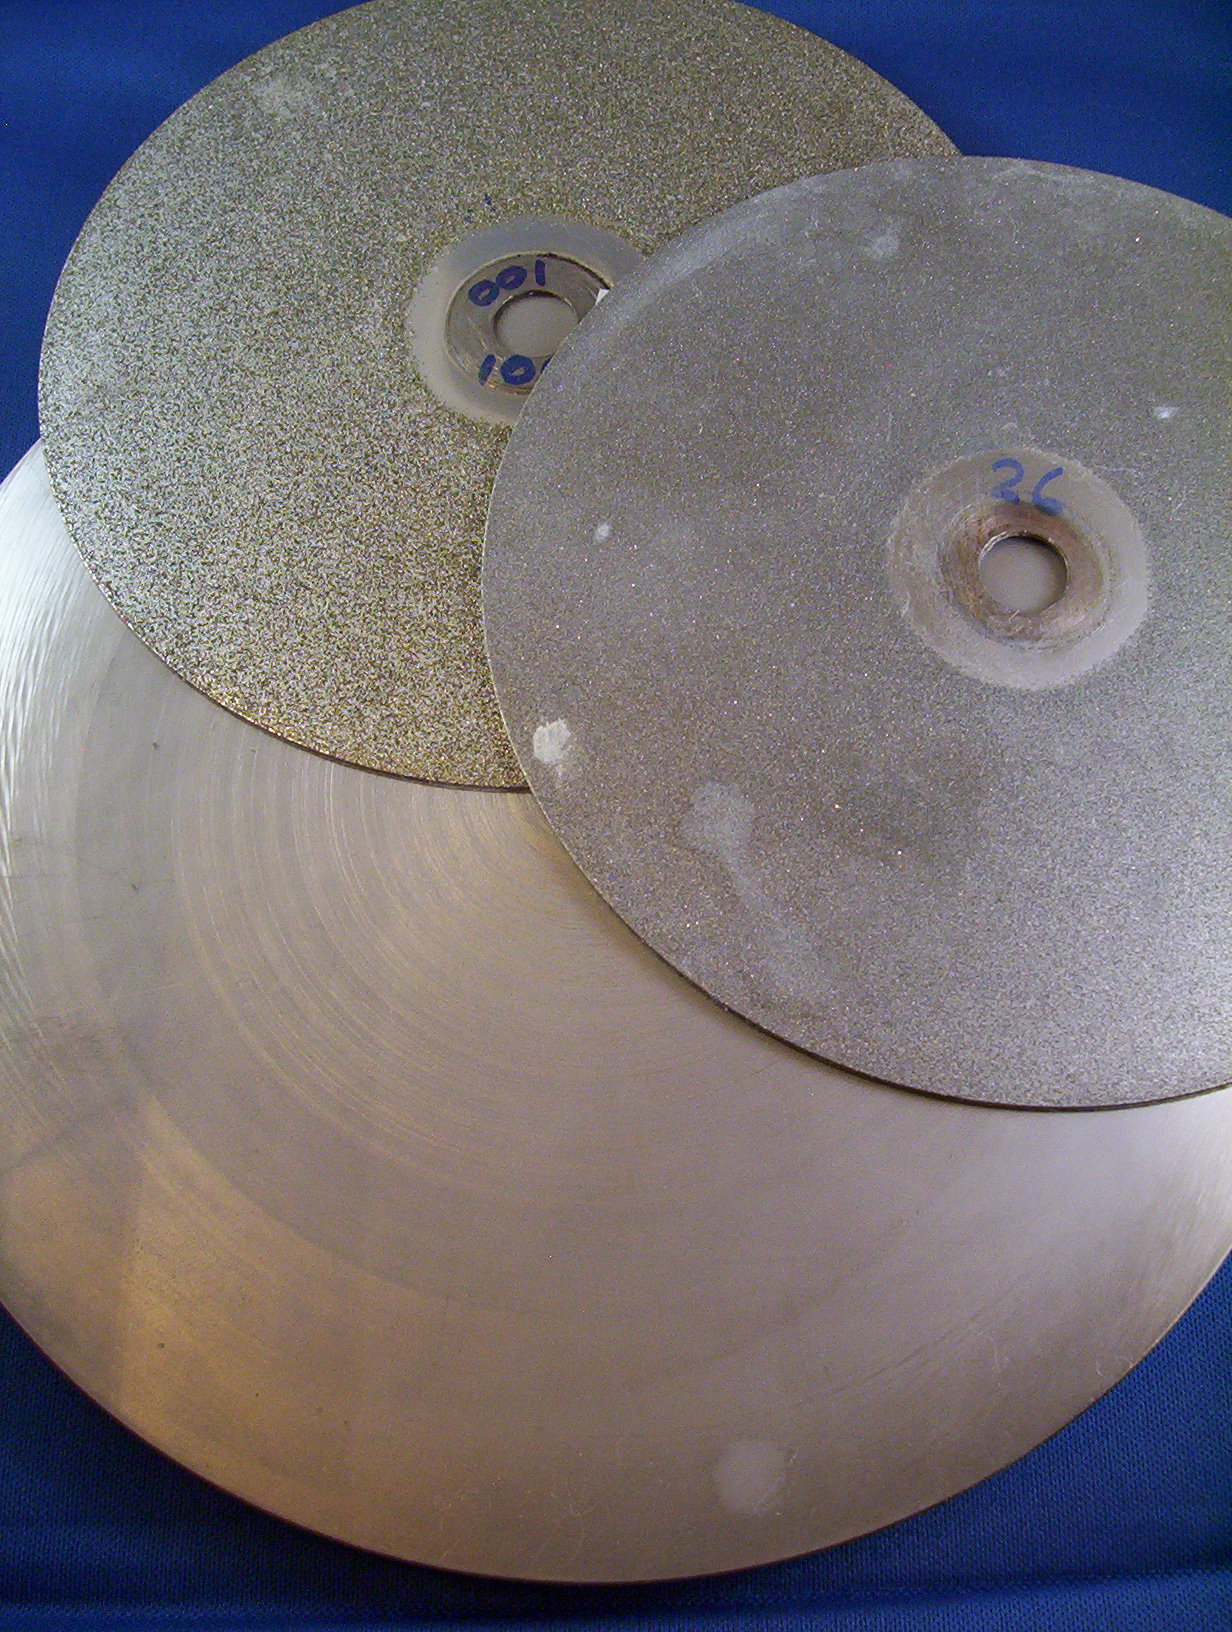
Figure 2 - Examples of diamond grinding disks, thin and thick.
Grinding.
Take the little slab, place it on the coarsest grinding disk with some water from a rinse water bowl or pan that you should have nearby. Use only one finger on the back of the piece and grind with a medium to light pressure and move in a zig-zag or circular or epicycular motion around the tool. Epicycular motion consists of moving the piece around in circles near the edge of the disk.
It's a good idea to move about the disk as best you can so you don't wear a low spot in one area. Grind it until all the saw or roughing marks are gone. Use a 10x handlens to inspect the piece as you grind it. If you had a steady hand on the saw and the cut marks have little relief, you could start with the 400/600 abrasive grade. After each abrasive be sure to inspect the surface to see if the pits left by the abrasive are uniform and that all the bigger pits and scratches from the previous abrasive have been removed. Especially check the edges for residual imperfections in the saw cut. Wash up the work between disks. One grain of rock in the finer grades will ruin your hard work. All this is particularly important if you are only using the three minimum grades of abrasive for grinding. I use the cafeteria tray with newspaper in the bottom to minimize mess.
Once all the saw marks have been ground off the specimen and you are sure on inspection that the piece is still flat and the grind pattern on the plate is even, you can go on to the next grade. I go straight from #100 or #200 to 500 and then 5 micron or #1200. This is the minimum amount of steps you should use but you can omit the #100/200 if the original saw cut is smooth enough.
Again with the finer grades, push the piece around in the abrasive with a medium to light pressure. Don't rush the grinding or you will break the specimen especially if it is thin. If in the finest stage the piece kicks and sticks, you need to go back to the previous disk and grind more. You probably have a hollow in the center of the piece. Some fossils, especially bone, can absorb water very rapidly and stick badly on the final grind. Keep the sample and tool good and wet.
Polishing.
We now need that very flat yielding medium to hold our cerium polishing compound. It also needs to be firm enough to not change the shape of the ground surface of the specimen. Find a very flat piece of metal or glass about 70-100mm diameter to act as the substrate in your polishing tool. If the edges are sharp make sure to bevel them off with a grinding stone. Next, go to your household rag-bag and get a piece of twill (from and old pair of workpants) or denim. Cut the rag to be just a bit smaller than the tool. Spray the tool and one side of the cloth with the contact cement and let dry. Then spray it again and put the two glued surfaces together and press against another very flat surface. After the glue is set charge the surface of the cloth with some of your polishing compound. Polish with a back and forth motion and good (but not hard) pressure. You will find that the cloth will have one direction that works better than another so use that. If the specimen is ground off well on the finest abrasive, it should polish up in just a few minutes. If not, or if the surface is scratched, go back to the finest abrasive tool and charge it with a little of the same grade loose abrasive (aluminum oxide is recommended). Use light pressure and grind until the scratches (as seen in a 10x loupe) are gone.
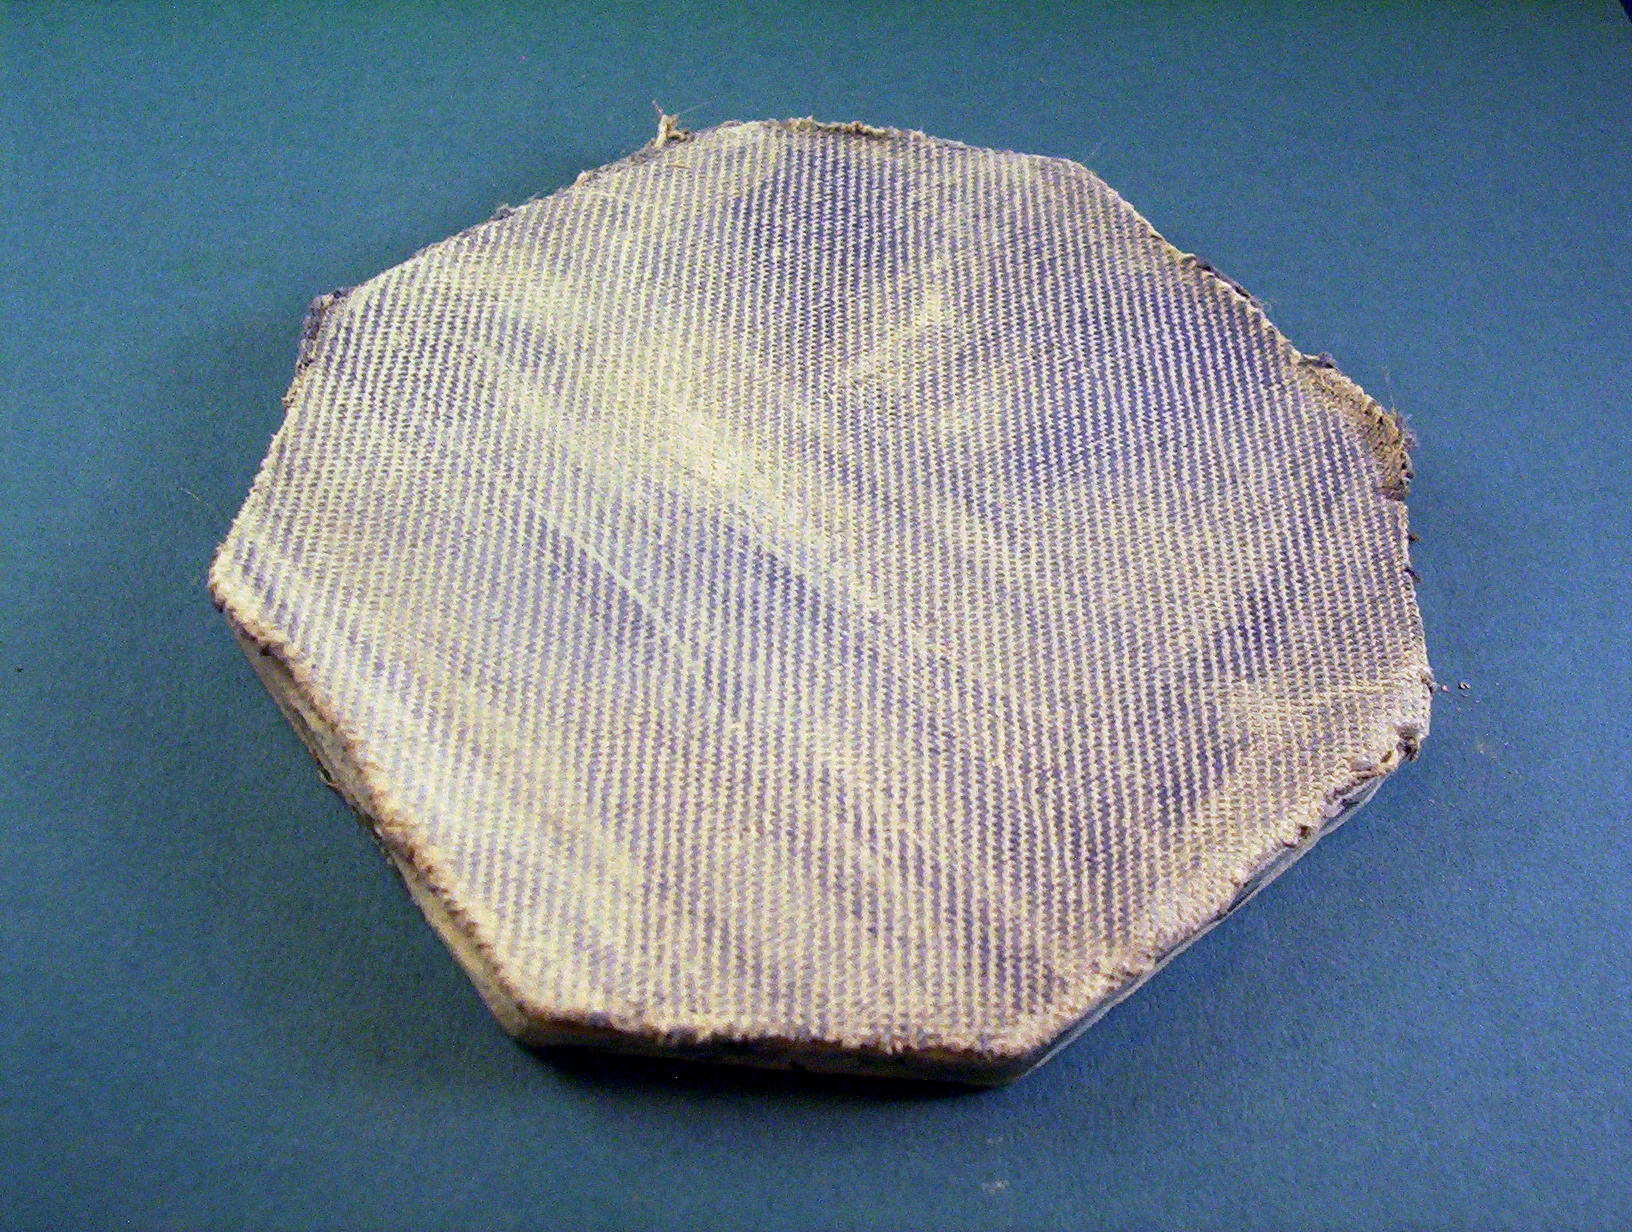
Figure 3 - A well used denim polishing tool on glass.
Slide Mounting.
There are a number of different micro-slides available (medical, petrographic etc.) plus you can make your own like the ones I make to fit a 35mm slide projector. It does not matter what you use but be sure to cut your specimens to fit the format of the slide before grinding.
All slides must be cleaned thoroughly. This is a most important step in making a successful slide. No slides are clean as delivered by the factory, in fact, they can't be. If the glass slides were perfectly clean cohesion of the glass surfaces would make it impossible for you to pry them apart. To avoid this manufacturers use a light dusting of powders like talc or thin films of silicone oils on the glass to keep them from sticking. This must be completely cleaned off for bonding to be strong enough to resist the tremendous shearing forces of polishing.
Basically you need to use a cleaner to remove water soluble residue, one for alcohol soluble residue and then something to mildly etch the glass. The best method of cleaning is to use Tri-Sodium Phosphate (TSP) as a water soluble cleaner followed by denatured alcohol and then a soak in vinegar. I have also successfully used Windex as the water soluble cleaner and 95% Isopropyl alcohol also followed by a vinegar soak. You should check each slide for any smears or films in reflected light and take every effort to get the slides scrupulously clean.
Lay the slides on a layer of paper several sheets thick on a solid flat surface. Be sure the surfaces are clean. Use slow set epoxy. The faster set epoxies can yellow in just a couple years or with exposure to sun. Additionally, you should avoid the fastest setting glues (5 min) and go for the longer (20 min. or longer) as these have different chemical formulae and bond to the glass better. With most epoxies the rock will grind much faster than the glue because of the glue’s slightly plastic texture. It also slows the polishing. I have not had good luck with the cyano-acrylic glues. They don’t hold well against the very strong shearing forces encountered in polishing.
If epoxy is used mix enough to do four or five slides at a time. Do not try to do too many at once. For your first attempt just do one or two. Take a Popsicle stick and wipe the glue on the specimen first to fill any pores. Then put a drop or two on the slide and push the sample into it working it back and forth a bit to seat it and get a good bead of glue around the outside. Do not use too much glue. It will become a messy job and a wide glue margin around the work will slow grinding and polishing. These will need 24 hours to bond completely before any grinding.
If you need to clean off any epoxy use a liquid (not gel) paint stripper and a Q-Tip. Don’t let any of that get near the sample or it may get sucked in (by capillary action) and loosen the bond.
In both cases, after the glue has set but not bonded you can look at the backside to inspect for bubbles. It is unlikely that there will be any but wherever there are will be a weak spot in the slide that may cause problems later. Be aware of this as you grind and polish the specimen. There is virtually nothing that can be done to fix this so you will have to treat this slide with greater care.

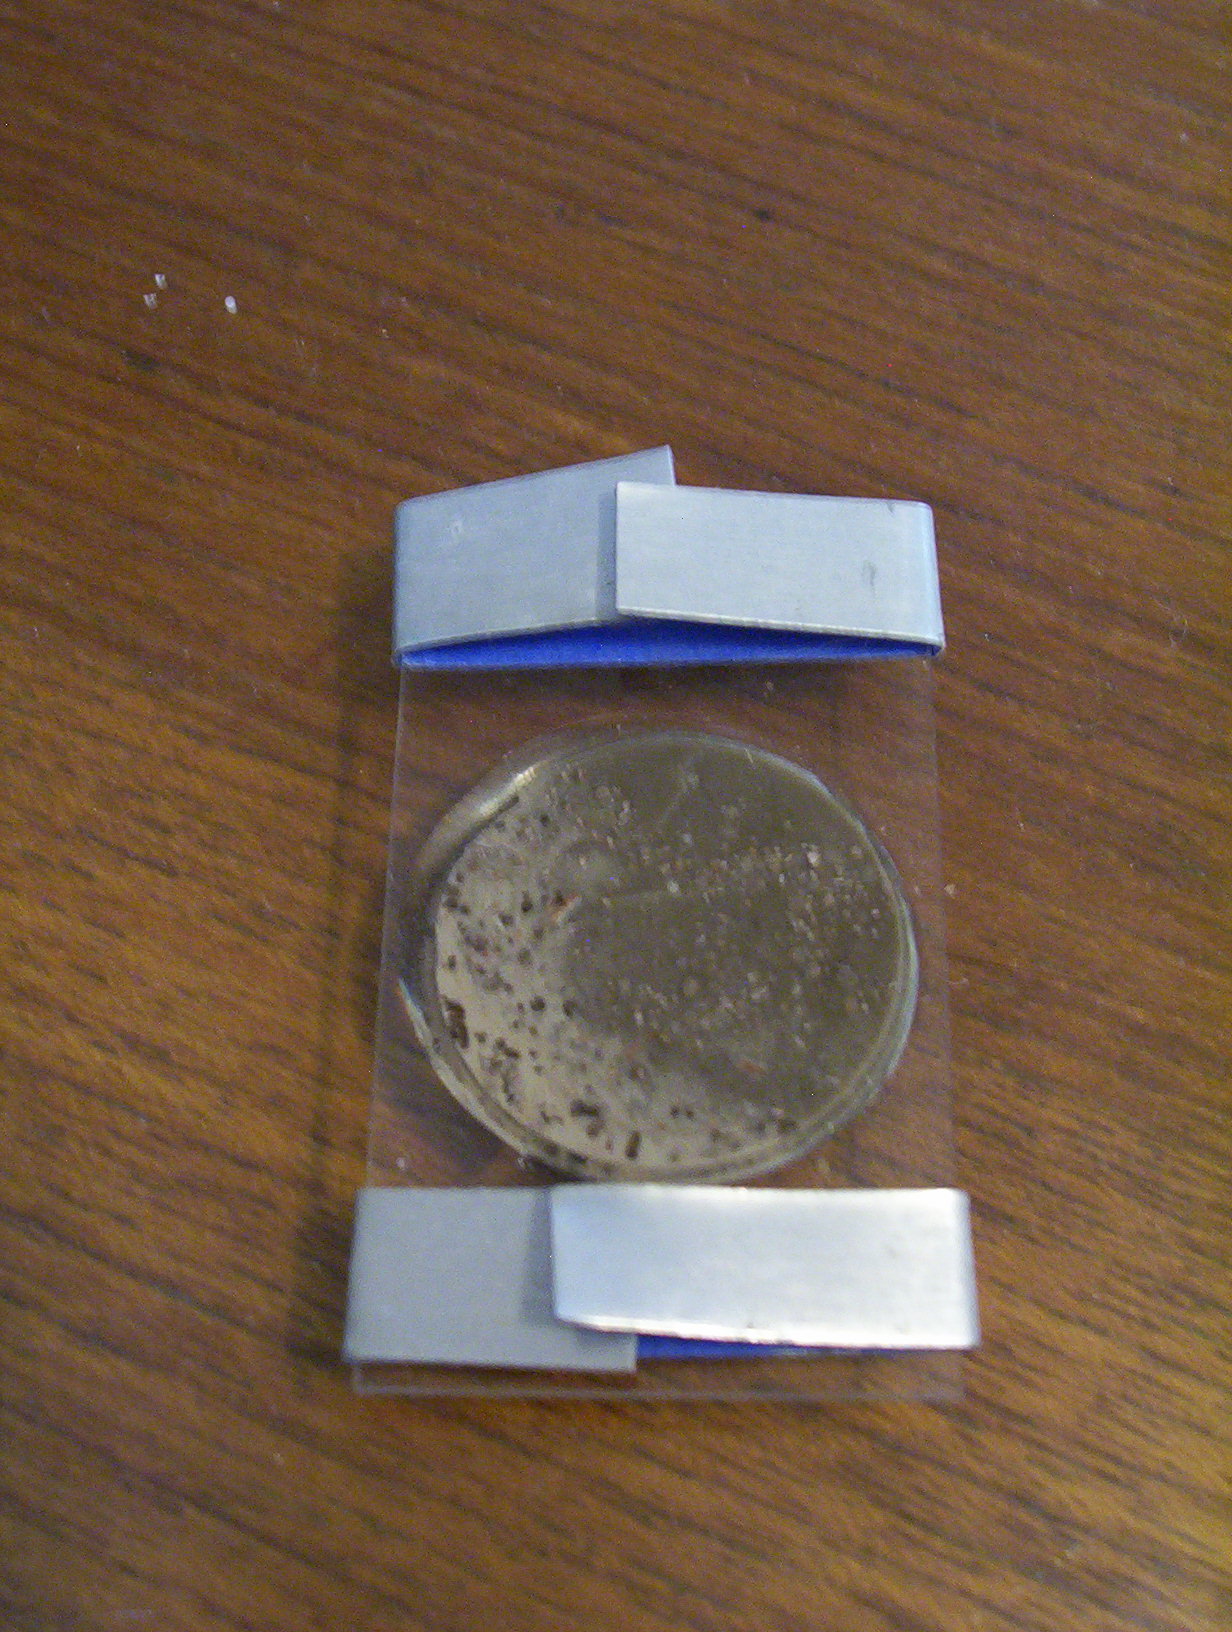
Figure 4b - A sample with the clips on it, trimmed and ready to go to the next step.
Thinning the specimen
Now that the little rock slab is glued to the glass microscope slide on it's polished side it is necessary to grind it down to the required thickness for transparency so you can literally see through rock without x-ray vision, even if the rock were kryptonite! The most important thing now is to make sure the front surface being ground becomes parallel to the glued down polished side, or the surface of the microscope slide itself. The latter is much easier and, it turns out, is easy to do.
Trim off any bulk excess (like in Fig. 4a) with a saw, preferably a rock saw but it could be done by hand. Then it's time to rough grind the sample while making it surface parallel to the glass slide.
For this task you will need some sort of shim stock. This is just thin metal that can be cut with scissors. It is desirable to have several thicknesses. Aluminum flashing will work for the first step. Better in the later stages are thinner brass shim stock available at hobby shops and hardware stores. Cut several strips from the thickest stock about 1/4" to 3/8" wide and the full length of at two times the width of the slide. Take one of the thickest strips and a blank or scrap microscope slide and wrap the piece of shim stock around the short dimension of the slide. This will be called the "clip" and two of these will be needed. One side of the clip will span the slide and the other will probably not or will overlap. Put the clips on the working slide so the side that spans the slide is on the rock or working side of the slide. There should be a clip on either side of the specimen. The object will be to grind the rock specimen down to the level of the clips. If you wrapped them carefully around the blank slide such that there is no bubble, bow or kinks in the clip surface, then when the specimen is ground down it will the same thickness across and parallel to the front surface of the slide.
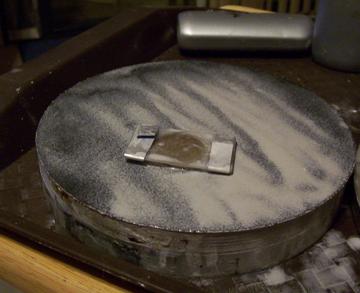
Figure 5 - The sample with the clips on it being roughed down.
A technique that has worked well is to grind the specimen down with 100/200 grit disk to the level of the first clip. This will be something less than 1mm thickness. Then wash up and go the next thickness clip. By the time you finish with the next grade and this clip, the specimen should be getting translucent when held up to a light. As soon as the first bit of light can be seen through the specimen stop with the coarsest grind and move to the next.
With the second grit grind the slide down to almost the desired finished thickness where it is easy to see through it with a light. After you can see through, remove the clips. Now you grind with less pressure to remove the pits from the previous grade and any final touch-up on the thickness or "wedge".
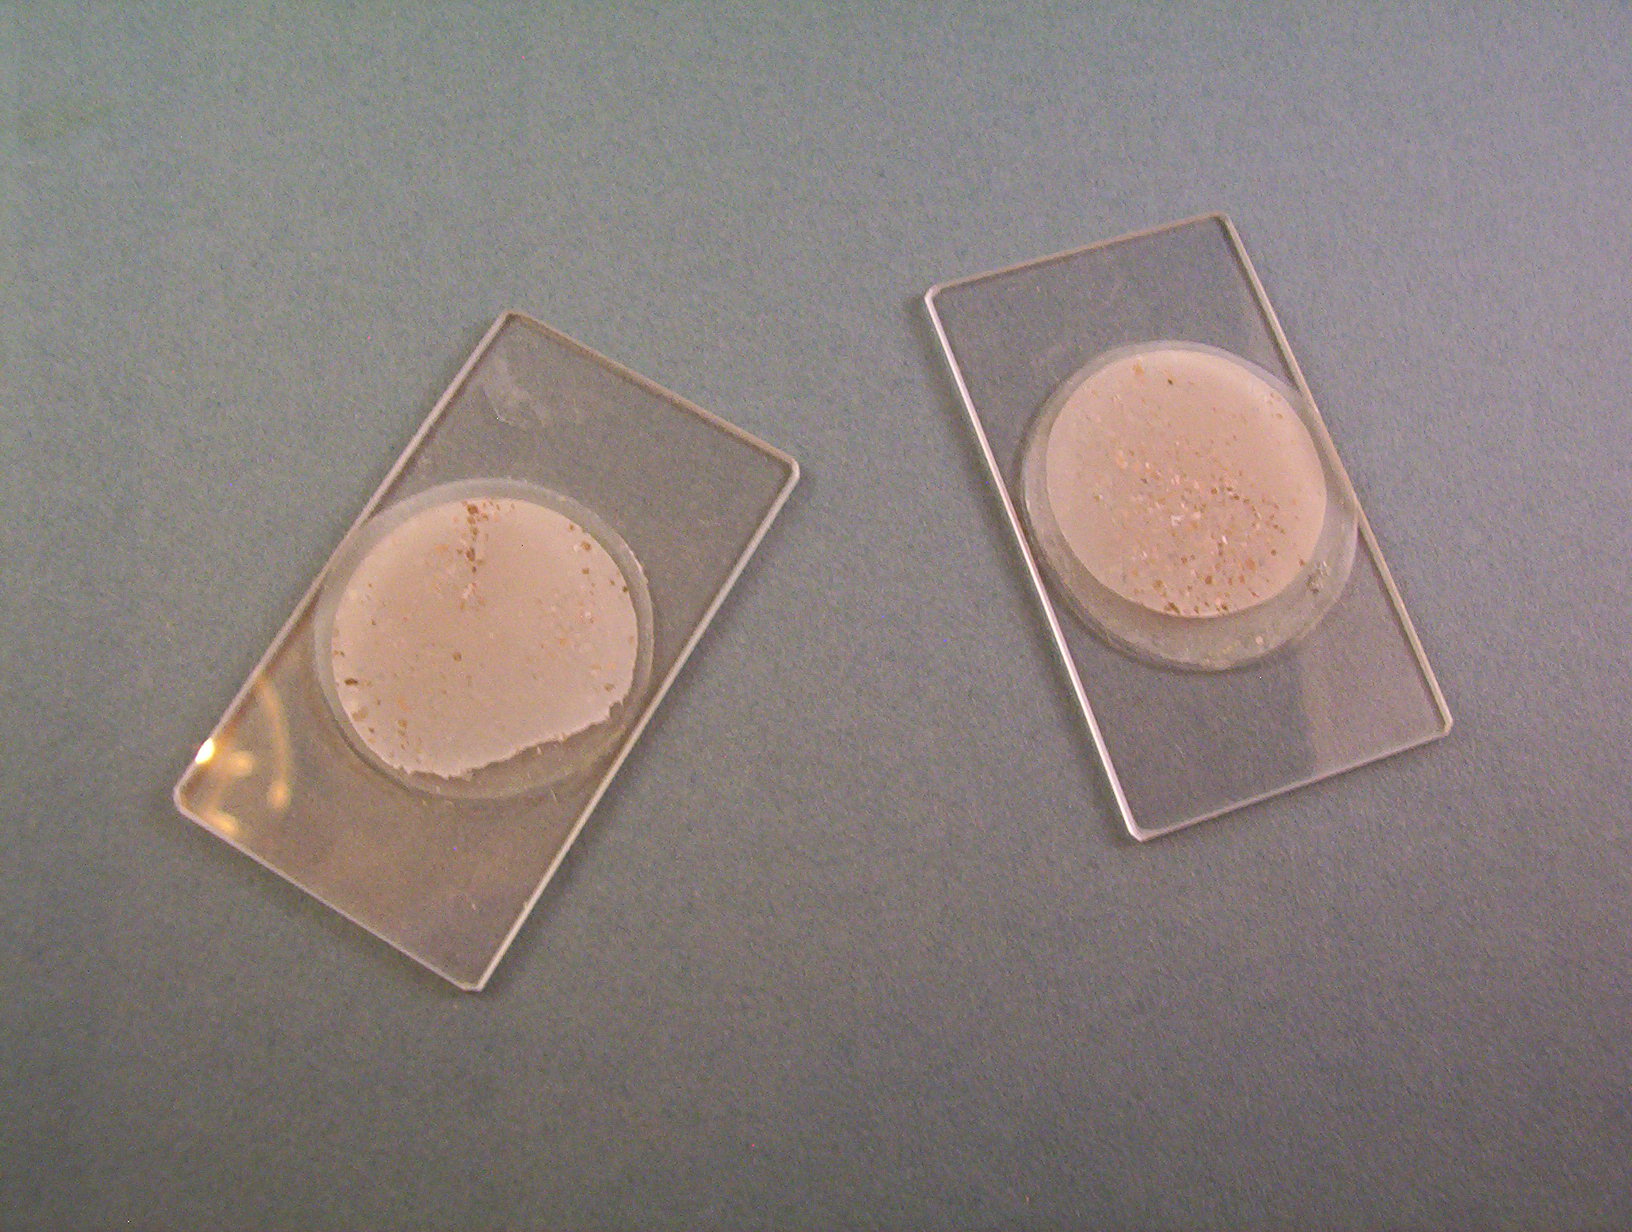
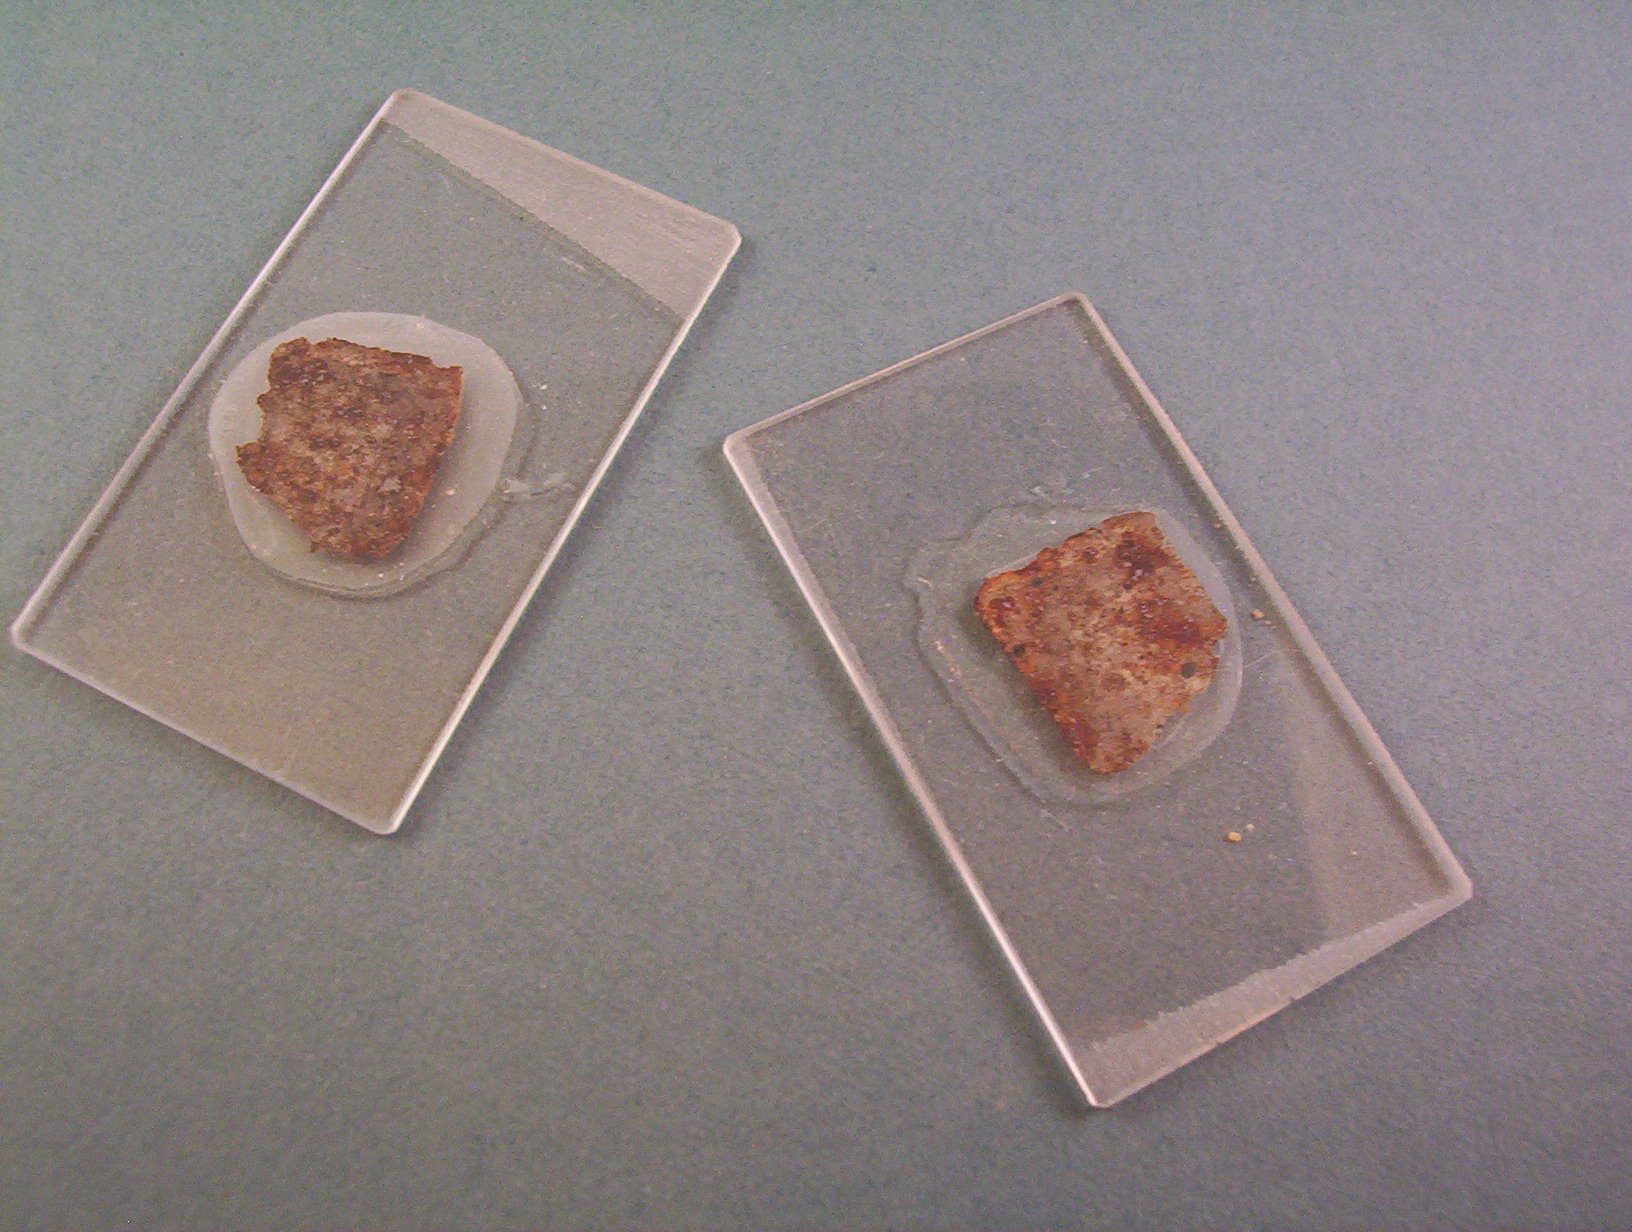
Figure 6 - Two limestone and two meteorite specimens thinned down.
"Wedge" is when one side of the specimen is thicker than the other. As you hold it up to the light usually one corner or side will be darker than the other. The cause can be poor grinding, a defective clip, a bit of grit or dust under one end of the specimen when it was glued down or a combination of these or it can be that the rock is just more opaque at that point. You will have to determine this. In the meteorite specimens above you can see that a couple of the slides are slightly ground on the edge. This was due to wedge in the glue though the specimens themselves were uniform in thickness. For all but the latter case, it can be corrected. When grinding in these final stages put the finger tip pressure over the darkest area when grinding. The slide and specimen are fairly flexible now and this will put a little more pressure on that spot causing it to grind a little more in that spot. Don't overdo it as the other side needs to stay co-planar with the corner you're grinding.
Go slow with the grinding in these stages, don't rush. You've put a lot of work into this and you don't want to wreck it now. Inspect the work frequently. When you can clearly see details in the fossils through the sample, go to the last grinding grit. Better to have to spend more time on the last stage than over shoot with the coarser stage. If a fossil pops out of the sample or disintegrates in grinding, as can most often happen with fusulinids, or the specimen grinds through above a trapped bubble in the glue underneath, then stop. You can fill the hole in with a little glue, let it dry for a day and then briefly go to the previous stage of grinding to level out the dried glue and then go to the final grind stage. This will not produce a high quality slide but it will save the slide to that point. To go on further with the grind would result in the disintegration of all or most of the slide. Better to have something than nothing!
Use the last grinding grit until the work has a shine to it when a light is reflected off of it at a low angle. (see Figure 6 below) Some rock will not shine no matter what, in which case you will just have to judge the grind as best you can. Experience will eventually be your guide. Try to remove wedge but in a first effort this may not be successful or necessary. This is not a disaster. The last wet with the finest grinding grade should be with very light pressure and should just skid about on the tool. This will smooth out the pits of this final grade and make the polish go even easier.
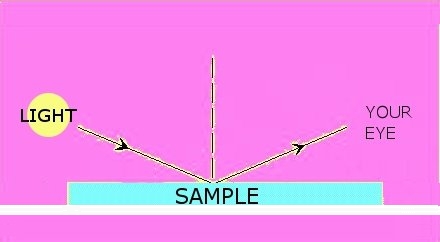
Figure 6 - Doing the reflectance test.
Final Polish.
Once the specimen passes the above test and there are no scratches and the specimen which should be quite transparent when wet, then it is time to polish. Again, using the denim or twill tool charged with cerium, polish until the epoxy and specimen is as clear as possible. The details in the fossils will become more and clearer as the specimen takes on a polish.
Occasionally the glue will begin to peel at this stage, especially the cyano-acrylic glues (one of the things I do not like). If this happens trim away some of the excess that is peeling with a razor blade or very sharp knife but don't overdo it. Good luck.
Leave the best margin around the specimen that you can. This peeling is a warning that the glue-glass bond is not as good as it could be. It will be necessary to put a cover glass over the specimen after the polishing.
Cover glass.
If it is necessary to put a cover glass on then wash the specimen and slide well making sure all the polishing residue is gone. Then let it dry for a day. Obtain a set of microscope cover glasses or cover-slips from a hobby/science shop or from a scientific supply house. Also try and get a low viscosity cyano-acrylic glue and its solvent. The latter is most important. The larger cover glasses are best to ensure the entire sample is covered. I use some that are nearly 1x1.5 inches. If you are using the smaller ones (1x1cm) then one drop of thin cyano-acrylic glue is all that will be needed. In fact, it will probably be too much. Apply the drop and gently push the cover into it softly applying pressure. Watch out that the glue does not get on the fingers. Wipe the excess with tissue or paper towel and don't worry about smears at this stage. You will have about 30 seconds to place the cover glass correctly so waste no time. Your first effort may not be a work of art. We can fix some of that, but a crooked cover glass is permanent.
After a few minutes, when the cover glass is well affixed, get a tissue or Q-Tip and put several drops of the solvent on it. Use this to clean up the excess glue and smears. You'll be pleasantly surprised how readily these clean up. Stubborn drops and glops of glue can be coaxed free with a single-edged razor blade.
Things that can be thin sectioned.
There is virtually no limit to the things you can section and enjoy. My own introduction to this was when the Arizona-Sonora Desert Museum (ASDM) asked me to look for fossils in the matrix from the Sonorasaurus site south of Tucson. As luck would have it, there was not a fossil to be found in the matrix with the possible exception of a tiny, fragmentary coprolite. The soil was very quartzitic and well sorted indicating a probable swift flowing stream deposition. But there were Sonorasaurus bone chips in the matrix and these did fascinate me. I then and there decided to make my first thin sections, and the only ones to date of the Sonorasaurus. When I saw the internal bone structure I was amazed. I had no idea such structure existed. Next, I did library research on bone histology and particularly books and papers on dinosaurian bone histology at the Univ. of Arizona Library and spent the summer of 1996 pouring over them and making thin sections of all the dino-bone I could lay my hands on. I had an idea that perhaps by measuring the diameters of the cellular structures in the dense bone, called Haversian Systems, I could make comparisons with other dinosaurs. My results are summarized in the paper given at the Fossil in Arizona conference for that year and co-authored by Ron Ratkevich formerly with the ASDM. Statistically, the secondary osteon diameters most resembled hadrosaurians and sauropods and not ceratopsians or carnosauria. (Reid, R.E.H. 1996)
I then embarked on a thin section exploration of many fossils and fossiliferous rocks. I have made sections of bones from the Devonian through the Pliocene and teeth as well. This technique lends itself well to making good use of bone chips and fragments, particularly if the parent creature is known. My wife, a meteoriticist with Lunar & Planetary Lab at Univ. of Arizona, has pressed my talents into service on igneous rocks as well, but they're not nearly as interesting now are they?
So the only limit to what you can section is your imagination. It is a powerful tool in determining ages, populations and doing statistics on all sorts of fossil facies.
How to stabilize crumbly matrix or bones.
One problem that does come up with some materials is stability of the fossils and/or matrix. This can be dealt with by several methods. For the most porous materials, soak the little sample with cyano-acrylic solvent and immediately put glue on it so as the solvent evaporates it pulls the glue into the specimen. Let this dry for a day or so and then put more of the glue on the outside. It should be hard enough by then to allow you to proceed with the processing. You could also warm the specimen in some manner and then put it in the glue. As it cools it will pull in the glue.
If a specimen, particularly hard brittle bone, crumbles from the perimeter as you grind, it may be best to coat it with epoxy or even encase it in a block of the material. This is frequently the case when working teeth. Broken and chipped teeth are cheap and very identifiable as to the original owner, usually right down to the species. This makes them very desirable as specimens. But they are also crumbly because of the strong layering. So it is usually necessary to encase them in epoxy just to keep them in one piece even after soaking them as above.
A word about cyano-acrylic glues here. I had several incidents of going to the emergency room with facial swelling and respiratory distress. After thinking about it and my actions before the outbreaks my wife and I found that it was anaphylactic shock from exposure to electro-static copier toner! Who would have expected that? The last attending physician told me to steer clear of cyano-acrylic glues as well since they are essentially the same thing as the toner. So beware and make sure you do not have such an allergy to these before you use them!
Some things are incredibly hard and resistant to grinding. Notably among these are dinosaur eggshells. The shell of the Titanosaur from Argentina is the hardest thing I have ever had to grind and just to get it down to a millimeter it was necessary to use a grinding wheel! The smell is strong and oily, worse than any Green River shale.
Fixing broken slides.
It will happen that you will break a slide. As Murphy would have it, this will be one of your better works that you need to save. All is not lost as long as the break does not occur through the specimen, but the remedy is tricky. Take another microscope slide the same size as the broken one and using the mounting glue (either type) glue the broken one to the new slide aligning it as best you can. Epoxy may be preferable for this job since it will not set up as fast as the cyano-acrylic glue but it is more prone to bubbles on such a large surface. Put a large drop or two in the middle of the slide and push the other squarely into the work. Work the two slides against each other well to force out any bubbles and don't use too much glue or the job will get quite messy.
Labeling.
This is done by running the slide up and down along the straight side with the portion to be frosted grinding on the surface of the tool. Finding a permanent but still small enough font labels was difficult and is still an ongoing process. The best solution so far has been the old tried and true method of hand lettering with pen, nib and India ink on a frosted end of the slide. We know this will work and last for at least a century. If your slides do not already have a frosted or fine ground end on them it will be necessary to make one. As yet I have not found any labels that will stick to glass in a fool proof fashion. Good luck!
Keep good records. This is very important should you find something new and unusual. Unlike with megafossils as there is an additional stage of separation from the original source. With an ordinary megafossil the specimen is collected in the field catalogued, stored and labeled. With microfossils, particularly with thin sections, the specimen is collected, cut out of the original matrix, prepared, then catalogued, stored and labeled. So it is very important that it be traceable back to the point of origin as specifically as possible. This does not mean that an unidentified fossiliferous rock cannot be useful. Thin sections from such a rock can be educational and just plain fun to look at.
Frequently, when at a show, a particularly interesting fossil laden rock will catch our eye. It will be poorly labeled or unlabelled but is reminiscent of several possible formations. A thin section, followed by analysis of the biota therein can, in many cases, nail the point of origin!
Microscopes
You do not need a fancy Bausch & Lomb binocular microscope with camera attachments and special illuminators to enjoy your slides. There are a number of much more economical means to view your work. Radio Shack and some hobby shops have very economical hand held microscopes at reasonable prices. These are alright for a single viewer but what about a bunch of people. As I said before, I make some of my slides in 35mm slide size. The specimen is usually made to fit the opening in a 35mm slide mount so when I am finished I can glue a 35mm slide frame to one side of the glass, to prevent breakage and to block light around the specimen. Then I only need to project the prepared slide like any other photographic slide and I have a microscope with which I can study my slide in comfort without having to squint through an eyepiece.
Another relatively inexpensive, low powered microscope is the old microfiche reader. These can be had at junk stores, garage sales and going-out-of-business sales for very little money. The slide, in fact up to half a dozen, can be put in the carrier at one time and studied by many people or yourself in relaxed comfort again not having to squint through the eyepiece.
Webcams can also be used with the addition of a weak power positive lens or you could hook one up to your microscope by focusing the camera lens to infinity and then focusing the microscope for your eye. By putting the two in contact (but not scuffing the lenses) you find that only a tweek is needed to the focus of the microscope to make the image sharp.
What to do with these?
Now you may proudly examine your handiwork. There may be a couple bubbles in it and it may be a bit thicker on one end than the other, but still it will show you a whole new world of fossil flora and fauna that will fascinate you for hours. Try making sketches of the things you see and then identify them. A lot will be learned from this process. Build a library of papers and books on the formations you wish to study. Identify the fossils in your sections.
It is a good idea to get a book on paleontological thin sections. These have been published by oil companies, societies and associations of economic geologists and paleontologists and are not too costly on the used market. (Johnson)
Learn to make sketches of these fossils or make digital images and keep a book of them. Using the same technique as above you can take your digital camera and put it up to the eyepiece to take your first images. Many will not be identifiable at first. Keep at it. It may take years to make positive identifications of all the fossils on a given slide during which time you will have undoubtedly made more slides that will also have unidentified creatures on them. Eventually you may even discover a new one. This is very possible in the world of microfossils and thin sections.
References: