
(For help with terms used in this paper, see the glossary at the end.)
Few can look at a spectrum for the first time without an exclamation of surprise and wonder. Nowhere in nature are colors so pure and vivid. The making of a spectrum has to most laypersons and school children always seemed a sacred art. Many know it is a means to study everything from the atom to galaxies but how this is accomplished is as mysterious as these objects themselves.
A simple spectroscope consists of a slit, some method of breaking the light into its array of colors, and some means of viewing them. Most classroom spectroscopes are a complex system that has a small telescope focusing the light onto a precision machined slit, frequently one that can change its aperture. This is followed by one or two lenses that send a collimated shaft of that light to a prism or grating either of which can be rather costly. Finally another telescope is needed for viewing the spectrum itself. Sound complicated? It is, and the cost for such instruments is often beyond the budget of many schools, and may even be as much as the entire budget for science materials in elementary or primary schools. But it is not necessary to get this complicated. Now, with the advent of the CD anyone can make a device that will allow them to not only view a spectrum, but do some crude analysis of bright light sources.
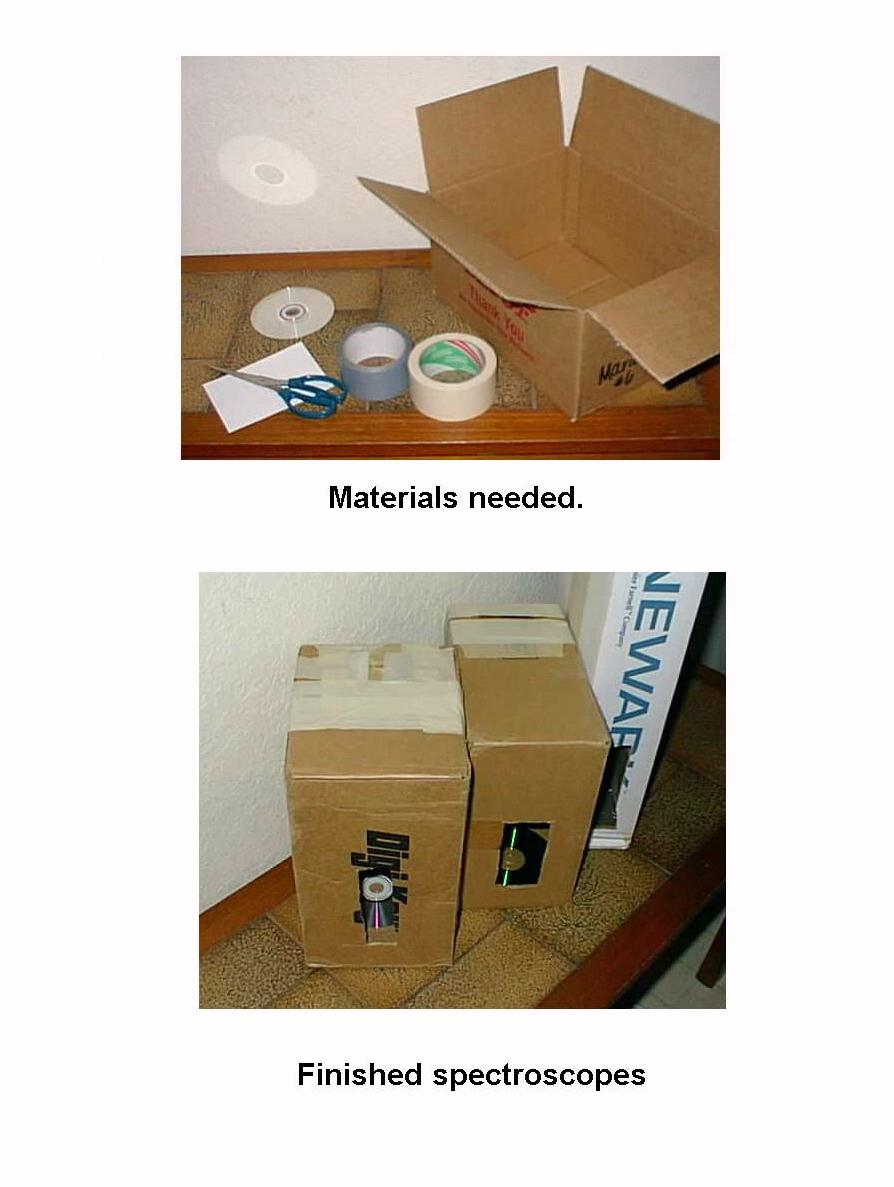
MATERIALS...
-a box 6x12x4 inches or larger
-one old but good condition CDROM disk
-aluminum foil or opaque thin plastic that can be cut with scissors
(heavy black construction paper can be used too)
-masking tape or better, opaque black tape.
CONSTRUCTION...
The most difficult thing to obtain will be CDs. (DVDs will not work well.) CDs are not only used for music and computer games. Many companies, particularly internet service providers, send them out free to prospective customers. Thousands of these disks are tossed out as useless garbage daily. A teacher or hobbyist need only collect these discards to be on the way to enjoying the rudiments of spectroscopy.
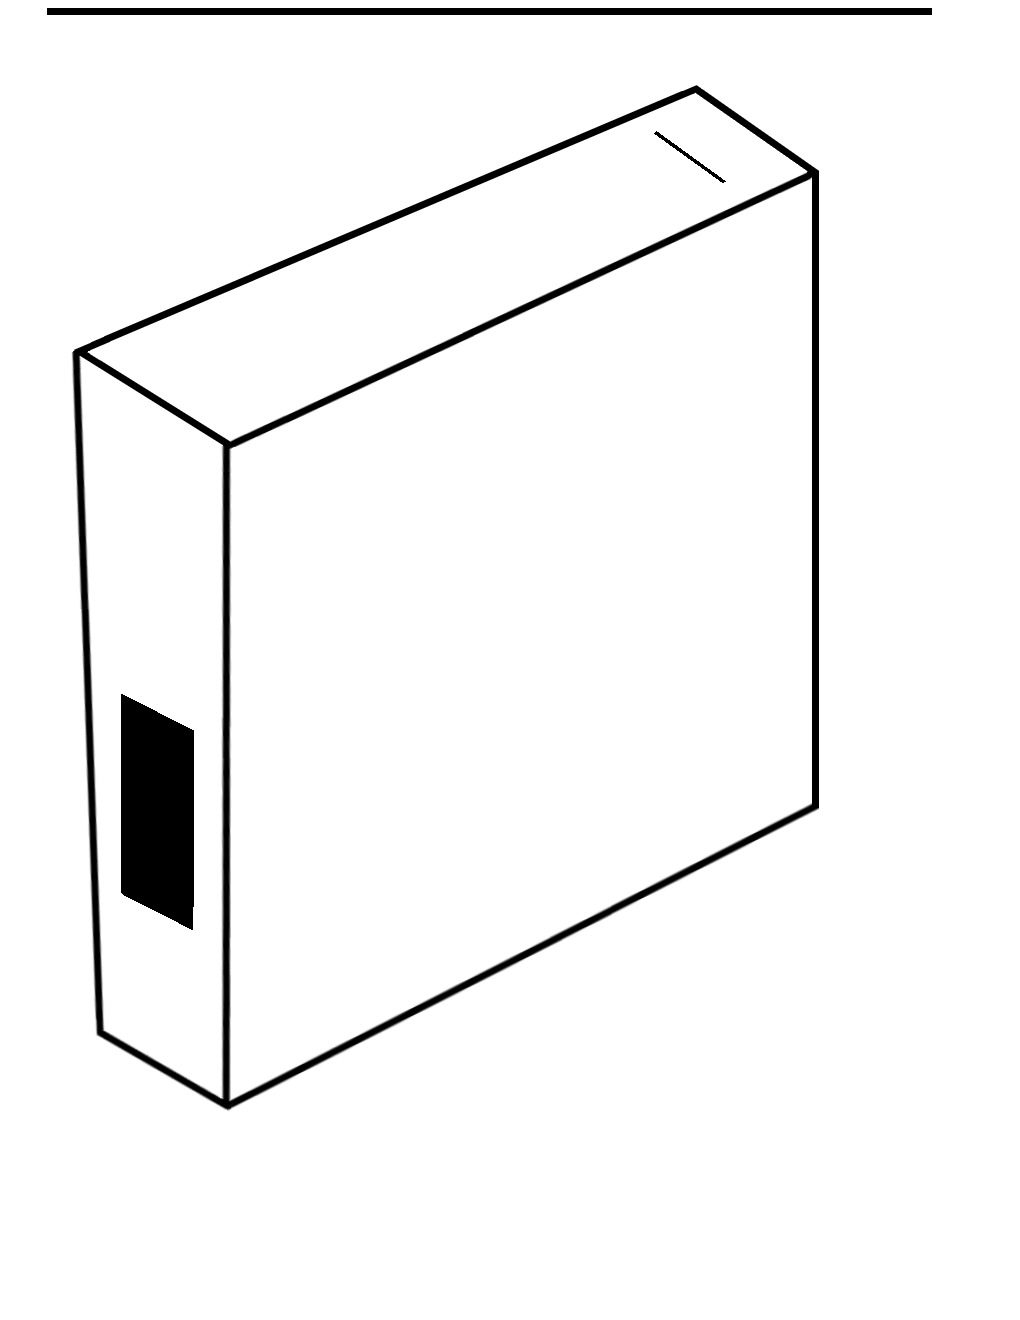
Set the box on end and cut a rectangular hole about one to two inches long and half an inch wide near one corner centered on one of the 4 inch sides. (See accompanying drawing.) Now we can draw the path the light will take on the side of the box. (See figure showing the light path.) On the side, draw a line from the center of that hole to the opposite side and then another line at 50 degrees going out the perpendicular side. This will tell you where to cut another hole for viewing. Cut two pieces of the construction paper and place them (glue or tape) over the first hole such that they form a slit about one millimeter wide. In the middle of that side, cut out several more pieces and arrange them so the slit is only about half an inch long. Place the CD in the box laying flat on the side opposite the slit such that the side of the CD nearest the viewport is right where the vertex of the drawn angle is (see fig. 1). Make sure the recorded or colorful side with no printing is facing up.
USE...
Most schools and even homes have one or more fluorescent lights. Place the spectroscope under one such that the line drawn from the slit to the CD is pointing at the light. Looking in the viewport you will see a thin shaft of light striking the CD. This is where you should see a spectrum vertically cross the CD. By moving your head up and down along the viewport hole you should be able to see the entire spectrum from red, through yellow, green, and blue to violet. Also notice the bright, colored, perpendicular lines that cross the spectrum. These are emission lines and this is an "emission spectrum" because the light is emitted in specific colored lines or wavelengths. The most prominent ones are in the yellow, green, blue and if you're lucky, in the violet. Note these on a drawing and write down their colors.
Now go to an ordinary incandescent light bulb. Notice that the colors are there in a smooth continuous band but none of the emission lines. This is called a "continuous spectrum" because the colors are continuous and unbroken by any dark or bright lines.
If it is daytime you can take the device outside and let skylight near the sun pass through the slit into the closed darkened box. This spectrum should be brilliant and, if you are sharp eyed as young students are, you may see extremely thin dark horizontal lines crossing the spectrum. These are absorption lines because they absorb the light at that color or wavelength. The thin dark lines will be difficult to see and will almost seem to float above the colored spectrum. Again, solar absorption lines are very difficult to see and may well not be seen at all.
SOME EXPERIMENTS
At night get close to different colored street lights. What kind of spectra do they produce? If they are emission spectra, do the lines appear in the same color regions as the fluorescent light? Which of the three types of spectra do they most look most like? What can you conclude from that? Note also which colors you can see. You will have a new understanding why some lights are blue-white and others are pinkish color like the sodium parking lights.
Try looking at different types of fluorescent lights (cool white, blue etc.). Are the bright lines in the same place?
Now we'll try some spectrophotometry. If you have a chemistry classroom handy, try looking at the light of a bunsen burner and then burn different chemicals in the flame (using proper laboratory precautions). What happens? Do you see more lines? What kind of spectra do you see?
If you can get some colored filters put them one at a time in front of the slit while looking at a good bright continuous light source or the sunlit sky. How do they affect the appearance of the spectrum?
Again, with the spectroscope on it's side, and using mirrors, try shining sunlight through water (in a clear glass or better, a flat sided clear bottle) with different chemicals dissolved in it placed just in front of the slit, especially if they color the water. What changes in the spectrum to you notice? Would any of these make good color filters?
Try some different colored liquids in front of the slit (wine, grape juice, red coolaid, soda, ink or anything) and pass sunlight through these. What happens to the spectra? Would any of these make good filters?
FURTHER REFINEMENTS
Improvements to the sharpness and resolution of lines in the spectra can be obtained by getting a box that allows the slit to be farther from the CD while your eye can remain the same distance.
Also, if a box is too narrow, a CD can be carefully trimmed in width using scissors with a good edge. Likewise, if there are limited CDs available, some or all could be cut in quarters. (The hub or center of the CD should be away from the viewport for best viewing so place the pieces accordingly in the box when mounting them.)
In general, the farther the CD is from the slit, the finer and sharper the lines will be. The farther your eye is from the CD the more resolution you will have in seeing these lines. So a long skinny box where your eye and slit are placed a good distance from the CD (say 2 to 3 feet) the more detail you will see in the spectra. This can only be carried on so far as the flaws in the plastic CD will soon limit performance. With fluourescent lights you can check for improved resolution by looking at the yellow (not green) line and see if you can detect that it is really two lines very close together!
Be careful not to scratch up the surface of the CD as these fine scratches will detract from the performance of the device.
Absorption lines - The dark lines that perpendicularly cross an absorption spectrum.
Absorption spectra - Spectra where the lines are black on a bright spectral background (continuum)
Continuum - The bright background made by a prism or grating when looking at a normal incandescent light bulb. This is often the background on which spectral dark or bright lines are laid when looking at things like the Sun or Moon (dark lines) or a fluorescent light (bright lines).
Continuous spectra - Spectra where there are no lines, only a smooth gradation through the colors from red through violet. Most easily seen in the spectrum of an incandescent light bulb.
Emission lines - The bright lines that perpendicularly cross an emission spectrum.
Emission spectra - Spectra where lines are bright against a dark or weak background of spectral colors.
Grating - A piece of glass or plastic on which lines of a particular shape are scratched or laid on such that they break light up into the spectrum.
Prism - A large piece of glass in one of a number of geometrical shapes that can, in certain orientations, break up light into a spectrum.
Spectra - The rainbow of colors produced by a prism or grating (a CDROM acts like a grating). One is called a spectrum, many are spectra. There are no such things as spectras, and spectrums.
*This paper copyright (c) Richard E. Hill 1998 and 2004