LPLC 2020 Video Guidelines
Video recordings will be uploaded by the individual presenters to a link emailed out to those who submit abstracts. The planning committee will then upload videos to a private channel on YouTube for participants to view the talks prior to the conference. Some guidelines on the videos are provided below:
- Talks must be less than 10 minutes long. Talks longer than 10 minutes will not be uploaded for the conference
- Video recording may include any combination of yourself, slides, whiteboard/blackboard writing, or other audio-visual content
- Videos should be in a format that can be uploaded to YouTube including MPEG4, AVI, MP4, MOV, and WMV
- See this Google help page for other format options and for help reformatting if needed
Recording with Zoom
Although any combination of hardware and software can be used to record your video, Zoom is a good option that many people have access to and are familiar with. Below are steps for recording via Zoom and where to find the recording on your computer for submission.
- Open the Zoom software on your computer
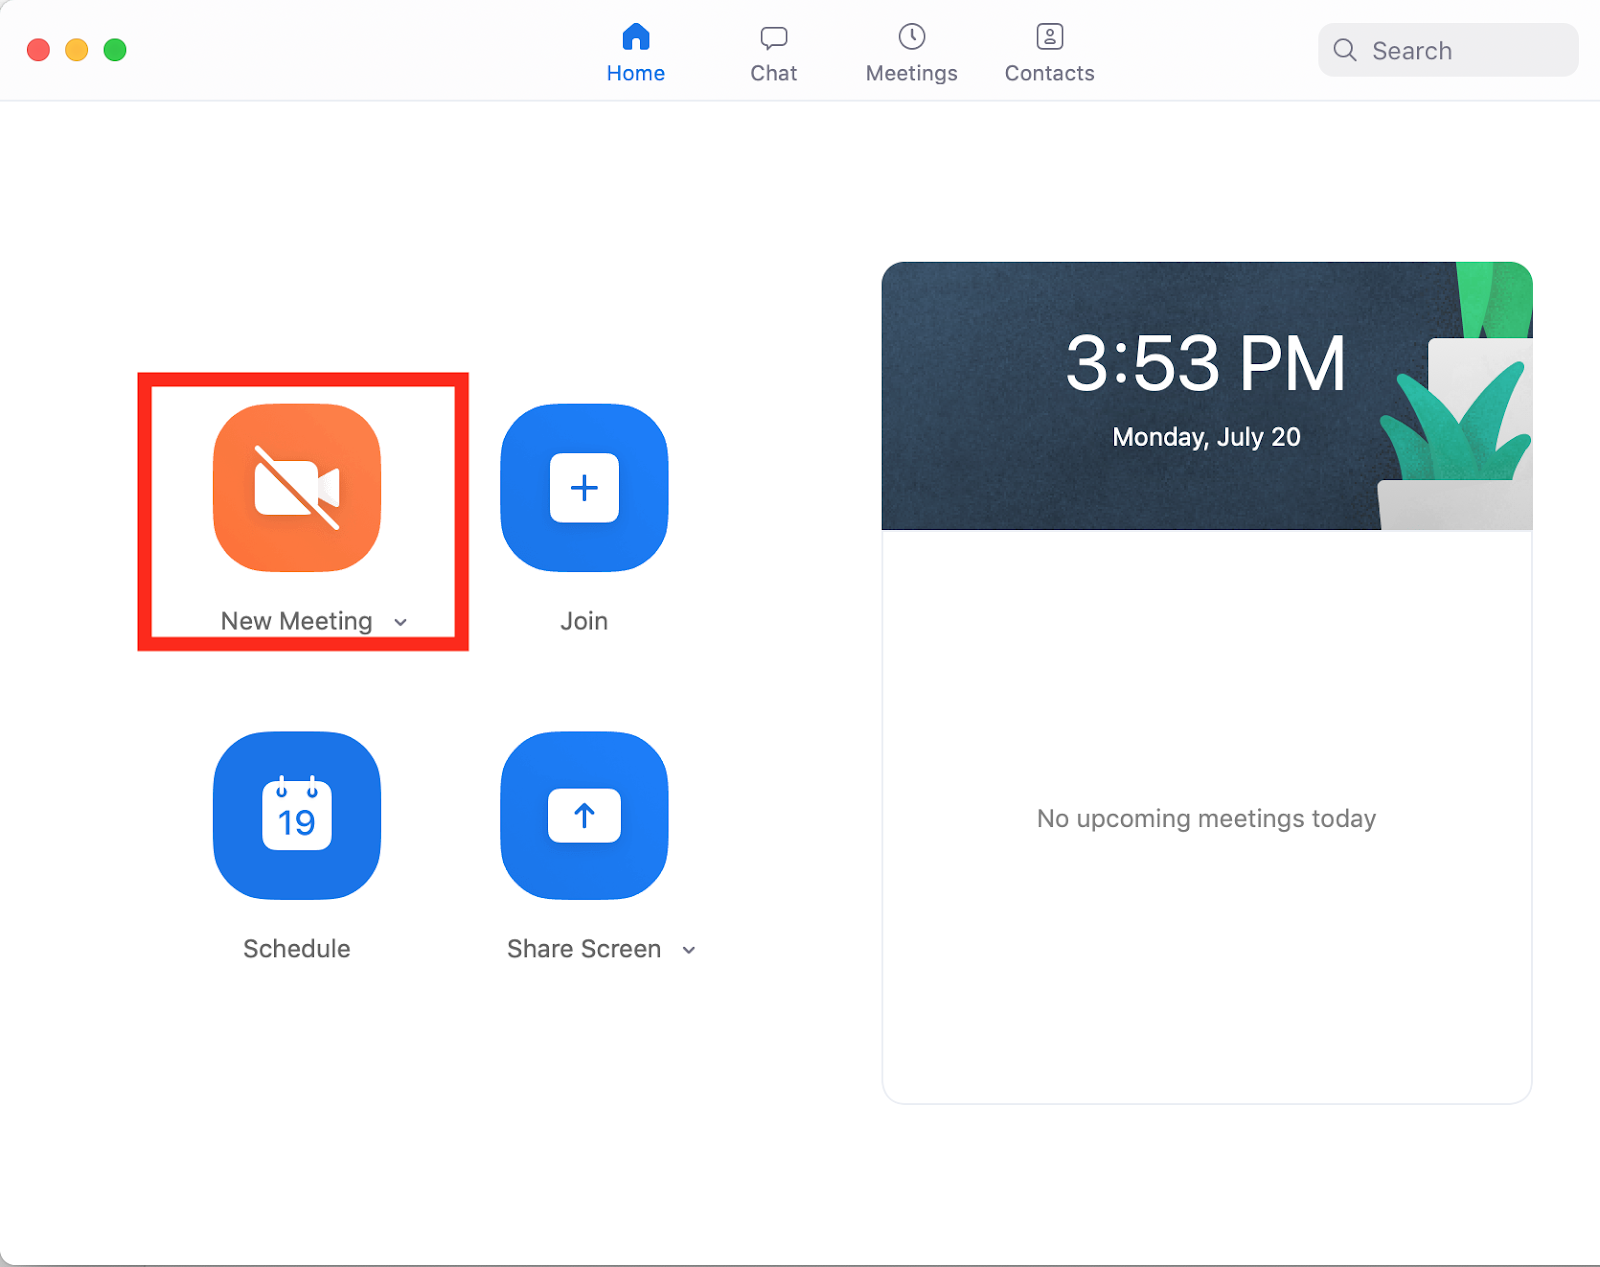
- Start a meeting either by clicking the "Start" button under your personal meeting ID, or by selecting the New Meeting option on the Home menu (see below)
- Setup the meeting with your preferred audio and visual settings. If you choose to use video, it will appear in the corner of your screen by default. Be aware of this and move the video box so that it does not block parts of your presentation
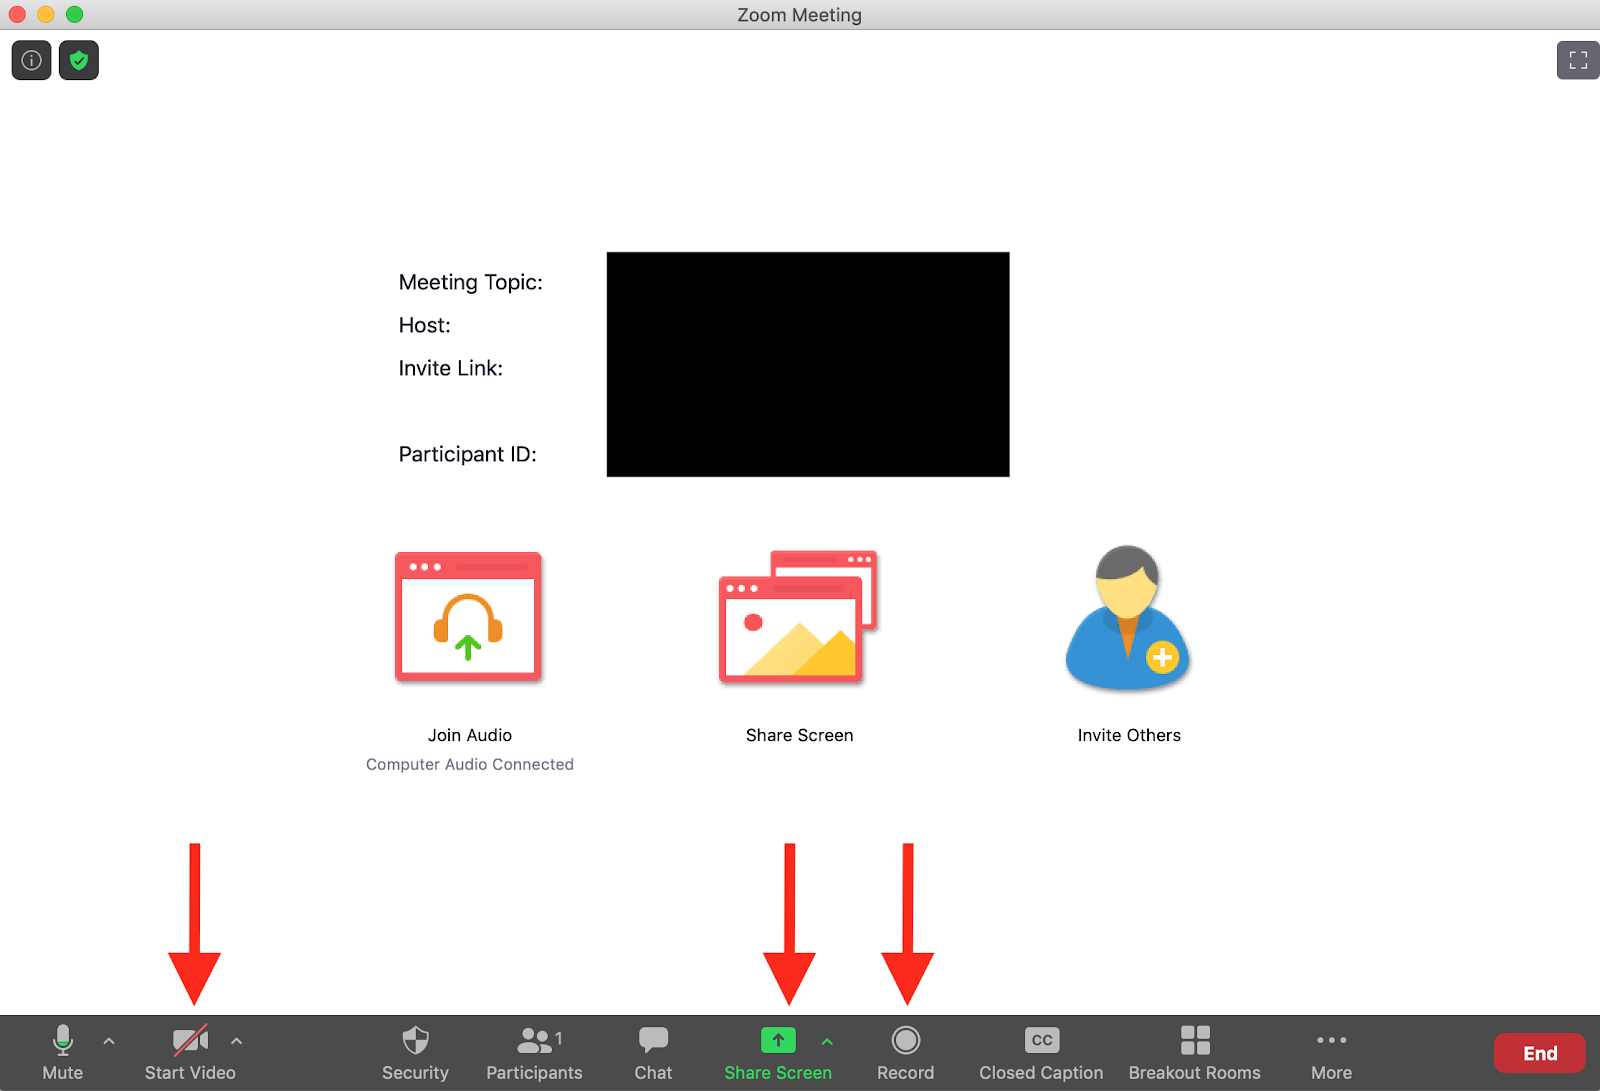
- Share your screen and select the window with your presentation material, if applicable. Note that Zoom also offers a virtual whiteboard option
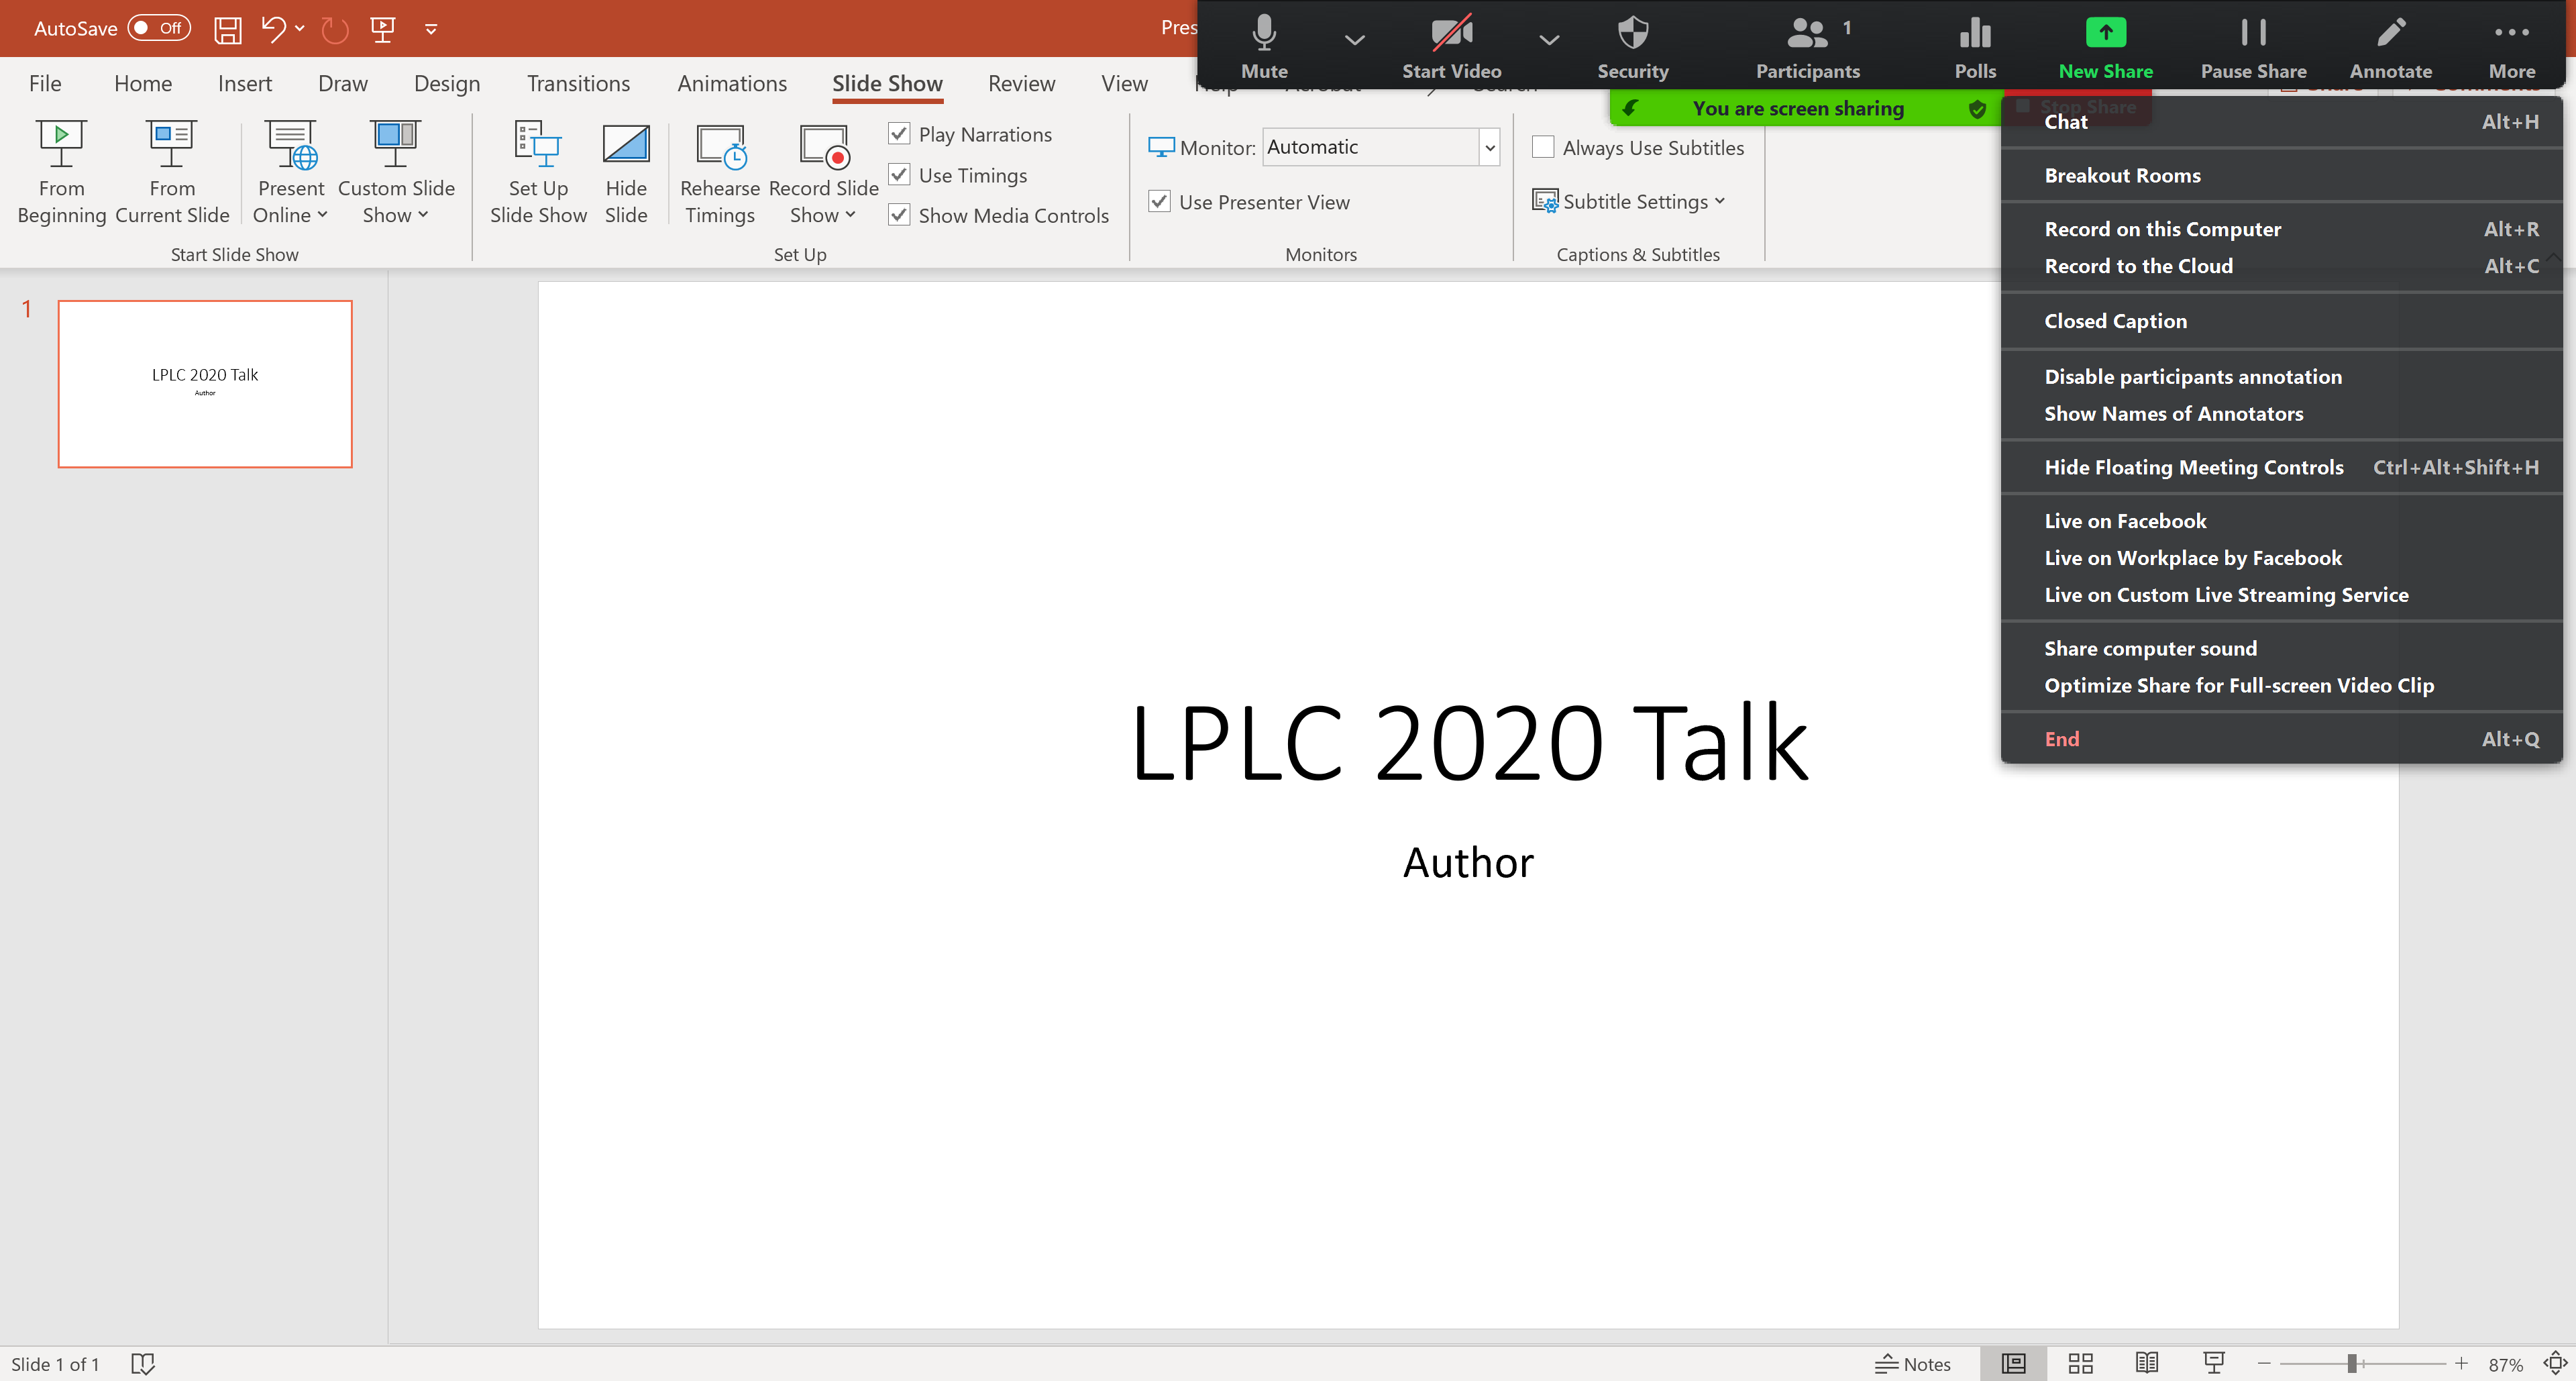
- Once you are ready to begin presenting (e.g. began slideshow), use Zoom's screen sharing toolbar to begin recording by selecting the "more..." button and then "Record on this Computer"
- Give your presentation
- Back on the Zoom screen sharing toolbar, you can pause and resume your video if you want. You don't have to record everything in one take. On the screen sharing toolbar, under "more..." select "Stop Recording" when you are finished
- Stop screen sharing and end the meeting
- A window will pop up saying Zoom is "Converting the meeting recording." Wait for this window to close
- A new window should appear in your computer's file explorer with the recording shown. If the window does not pop up, the zoom meeting by default is saved in a "Zoom" folder in your "Documents" for Windows, Linux, and Mac users.
- For example, "C:\Users\your_name\Documents\zoom\2020-07-21 hr.min.sec your name's personal meeting room xxxxxxxxxx"
- Be sure to rename and save the ".mp4" file which includes video and audio of the recording and is a preferred format
- Please review your recording to make sure the audio and video worked as expected
- Upload the video to the Box Drive link which will be sent to presenters via email once registration is closed